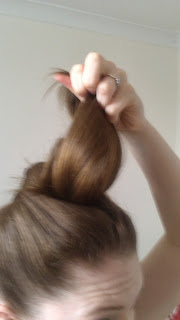
This is my very first attempt at a hair tutorial so I do apologise if it's hard to follow...
Today I thought I'd demonstrate how to so a sleek top knot like this:
Today I thought I'd demonstrate how to so a sleek top knot like this:
What you'll need is:
Hair that is one or 2 days 'old'...
Silky clean hair will be a lot harder to stay up like this.
You can do this with curly or wavy hair but it looks best and sleek when your hair has been straightened.
A hair tie, some kirby grips (or bobby pins...whatever you call them), a smoothing brush, and a topsy tail (the black loopy thing)
1. Start by brushing all your hair through making sure it's smooth and de-tangled.
2. Tip your head upside down and brush all your hair into a high pony tail
3. Tie and smooth out any bumps so it looks sleek.
4. Put your pony tail through the loop in the topsy tail
5. Using the tail part, start threading underneath the pony tail up. (Look at the photo if you get stuck) Look how the loop is around the pony tail, and the 'tail' is poking out the top.
6. Pull the pony tail through the hole so it rests on top of your head.
7. Lift the pony tail up and tighten the hair tie.
8. Back comb the ponytail gently.
9. Smooth out the front and gather all the ends...it should look really puffy.
10. Pull the ends backwards, and just give it another smooth over.
11. Tuck the ends under, and roll back towards the hair tie. Secure with the grips, but try to hide themin the hair if possible. It makes it look more professional if you can't see the grips.
12. Go over the rest of your hair gently with your smoothing brush and spray a light mist of hairspray all over. A little shine spray on the top knot for evenings will give it a more sleek look.
13. DONE!
Remember to practise - not everyone will get this prefect first time!
Did you like this look?
Will you try it?
Send me photos if you decide to give it a go!
Hailie
xo


No comments:
Post a Comment